
Every App Needs Image Resizing
User uploads a 4000x3000 photo. Your thumbnail needs to be 200x200. Your product listing needs 800x600. Your social share card needs 1200x630. The original image fits none of these.
You could install Sharp, write the resizing logic, handle edge cases (what if the image is portrait? what if it’s smaller than the target?), deploy it, and maintain the server. Or you could make one API call.
The Iteration Layer Image Transformation API resizes and crops images in the cloud. Send an image, define your operations, get the result back. No server, no library, no Docker container.
Resize: Five Fit Strategies
The resize operation takes a target width, height, and a fit strategy that determines how the image fills the target dimensions:
curl -X POST \
  https://api.iterationlayer.com/image-transformation/v1/transform \
  -H "Authorization: Bearer YOUR_API_KEY" \
  -H "Content-Type: application/json" \
  -d '{
    "file": {
      "type": "url",
      "name": "photo.jpg",
      "url": "https://example.com/photo.jpg"
    },
    "operations": [
      {
        "type": "resize",
        "width_in_px": 800,
        "height_in_px": 600,
        "fit": "cover"
      }
    ]
}'{
"success": true,
"data": {
"buffer": "/9j/4AAQSkZJRgABAQAAAQ...",
"mime_type": "image/jpeg"
}
}import { IterationLayer } from "iterationlayer";
const client = new IterationLayer({
apiKey: "YOUR_API_KEY",
});
const { data: { buffer: imageBase64 } } =
await client.transformImage({
file: {
type: "url",
name: "photo.jpg",
url: "https://example.com/photo.jpg",
},
operations: [
{
type: "resize",
width_in_px: 800,
height_in_px: 600,
fit: "cover",
},
],
});{
"success": true,
"data": {
"buffer": "/9j/4AAQSkZJRgABAQAAAQ...",
"mime_type": "image/jpeg"
}
}from iterationlayer import IterationLayer
client = IterationLayer(api_key="YOUR_API_KEY")
result = client.transform_image(
file={
"type": "url",
"name": "photo.jpg",
"url": "https://example.com/photo.jpg",
},
operations=[
{
"type": "resize",
"width_in_px": 800,
"height_in_px": 600,
"fit": "cover",
},
],
){
"success": true,
"data": {
"buffer": "/9j/4AAQSkZJRgABAQAAAQ...",
"mime_type": "image/jpeg"
}
}package main
import il "github.com/iterationlayer/sdk-go"
client := il.NewClient("YOUR_API_KEY")
result, err := client.TransformImage(il.TransformImageRequest{
File: il.NewFileFromURL(
"photo.jpg",
"https://example.com/photo.jpg",
),
Operations: []il.TransformOperation{
il.NewResizeOperation(800, 600, "cover"),
},
}){
"success": true,
"data": {
"buffer": "/9j/4AAQSkZJRgABAQAAAQ...",
"mime_type": "image/jpeg"
}
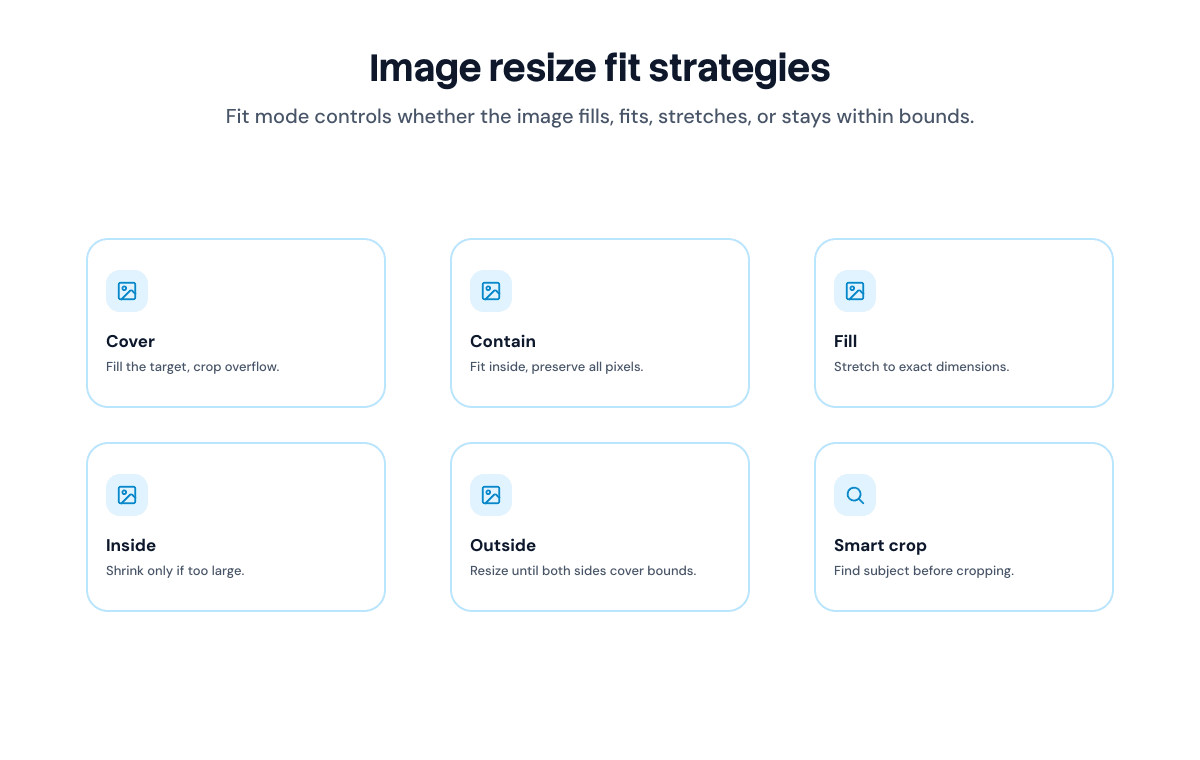
}The five fit strategies:
-
cover— scales the image to fill the target dimensions, cropping any overflow. The result is exactly width x height with no empty space. Best for thumbnails and cards where you need an exact size. -
contain— scales the image to fit entirely within the target dimensions, adding letterboxing if the aspect ratios don’t match. The result is at most width x height. Best when you need the full image visible. -
fill— stretches the image to exactly width x height, ignoring aspect ratio. Best for backgrounds or abstract patterns where distortion doesn’t matter. -
inside— scales down to fit within the target dimensions, preserving aspect ratio, never upscaling. The result may be smaller than the target. Best for constraining maximum dimensions. -
outside— scales so the image covers the target dimensions, preserving aspect ratio, never downscaling. The result may be larger than the target. Best when you want to guarantee minimum dimensions.
Choosing the Right Fit Strategy
The fit strategy you pick depends on what you’re building. Here’s how each one maps to common use cases.
cover for thumbnails and cards. When you need a grid of identically-sized images — product listings, team member cards, gallery thumbnails — cover guarantees every image is the exact same dimensions. The tradeoff is that parts of the image may be cropped. For product photos shot against clean backgrounds, the crop is usually imperceptible. For portraits, combine cover with smart_crop to keep faces visible.
contain for previews and lightboxes. When users expect to see the entire image — document previews, artwork displays, lightbox modals — contain preserves everything. The image sits within a bounding box, so you may get letterboxing (bars on the sides or top/bottom). Pair it with the extend operation and a background color to fill the letterbox area with a solid color instead of transparency.
inside for upload constraints. When users upload images and you need to cap the dimensions without upscaling small images, inside is the right fit. A 4000x3000 photo resized with inside at 1920x1080 becomes 1440x1080. A 800x600 photo stays at 800x600. This is what you want for content management systems where you need to limit bandwidth without distorting smaller images.
outside for minimum size guarantees. When a downstream process requires a minimum resolution — print workflows, large-format displays — outside ensures the image is at least the target dimensions. The result may be larger, which you can then crop to exact size.
Crop: Extract a Region
The crop operation extracts a rectangular region from the image:
curl -X POST \
  https://api.iterationlayer.com/image-transformation/v1/transform \
  -H "Authorization: Bearer YOUR_API_KEY" \
  -H "Content-Type: application/json" \
  -d '{
    "file": {
      "type": "url",
      "name": "photo.jpg",
      "url": "https://example.com/photo.jpg"
    },
    "operations": [
      {
        "type": "crop",
        "left_in_px": 0,
        "top_in_px": 0,
        "width_in_px": 500,
        "height_in_px": 400
      }
    ]
  }'
const operations = [
{
type: "crop",
left_in_px: 100,
top_in_px: 50,
width_in_px: 500,
height_in_px: 400,
},
];operations = [
{
"type": "crop",
"left_in_px": 0,
"top_in_px": 0,
"width_in_px": 500,
"height_in_px": 400,
},
]operations := []il.TransformOperation{
il.NewCropOperation(100, 50, 500, 400),
}This cuts a 500x400 rectangle starting at position (100, 50) from the top-left corner. Useful when you know exactly which region of the image you need.
Manual crop is common in image editors and annotation tools where the user draws a selection rectangle. Your frontend captures the coordinates, and the API does the extraction.
Smart Crop: Let AI Find the Subject
Manual cropping requires knowing where the subject is. The smart_crop operation handles that automatically — it uses AI object detection to find the main subject (a face, a product, a focal point) and crops around it:
curl -X POST \
  https://api.iterationlayer.com/image-transformation/v1/transform \
  -H "Authorization: Bearer YOUR_API_KEY" \
  -H "Content-Type: application/json" \
  -d '{
    "file": {
      "type": "url",
      "name": "photo.jpg",
      "url": "https://example.com/photo.jpg"
    },
    "operations": [
      {
        "type": "smart_crop",
        "width_in_px": 400,
        "height_in_px": 400
      }
    ]
  }'
const operations = [
{
type: "smart_crop",
width_in_px: 400,
height_in_px: 400,
},
];operations = [
{
"type": "smart_crop",
"width_in_px": 400,
"height_in_px": 400,
},
]operations := []il.TransformOperation{
il.NewSmartCropOperation(400, 400),
}The result is a 400x400 image with the subject centered. No coordinate math, no face detection library, no guesswork about where to crop.
Smart crop is particularly useful for:
- Profile pictures — always centers the face
- Product thumbnails — keeps the product in frame regardless of the original composition
- Content cards — finds the focal point of editorial images
The difference between resize with cover and smart_crop is intelligence. cover crops from the center. smart_crop crops around the detected subject. For images where the subject isn’t centered — a person standing to the left, a product in the bottom-right corner — smart crop produces noticeably better results.
Responsive Images with Resize
Modern web development requires multiple sizes of every image. A hero image might need five variants for different screen widths. The resize operation handles this naturally:
# Generate each variant separately
for WIDTH in 320 640 960 1280 1920; do
  HEIGHT=$((WIDTH * 9 / 16))
  curl -X POST \
    https://api.iterationlayer.com/image-transformation/v1/transform \
    -H "Authorization: Bearer YOUR_API_KEY" \
    -H "Content-Type: application/json" \
    -d "{
      \"file\": {
        \"type\": \"url\",
        \"name\": \"hero.jpg\",
        \"url\": \"https://example.com/hero.jpg\"
      },
      \"operations\": [
        {
          \"type\": \"resize\",
          \"width\": $WIDTH,
          \"height\": $HEIGHT,
          \"fit\": \"cover\"
        },
        {
          \"type\": \"convert\",
          \"format\": \"webp\",
          \"quality\": 85
        }
      ]
    }" -o "hero-${WIDTH}.webp"
done
import { IterationLayer } from "iterationlayer";
const client = new IterationLayer({
apiKey: "YOUR_API_KEY",
});
const widths = [320, 640, 960, 1280, 1920];
const variants = await Promise.all(
widths.map(async (width) => {
const { data: { buffer } } = await client.transformImage({
file: {
type: "url",
name: "hero.jpg",
url: sourceUrl,
},
operations: [
{
type: "resize",
width_in_px: width,
height_in_px: Math.round(width * 0.5625),
fit: "cover",
},
{
type: "convert",
format: "webp",
quality: 85,
},
],
});
return {
width,
buffer: Buffer.from(buffer, "base64"),
};
})
);from iterationlayer import IterationLayer
client = IterationLayer(api_key="YOUR_API_KEY")
widths = [320, 640, 960, 1280, 1920]
variants = []
for width in widths:
result = client.transform_image(
file={
"type": "url",
"name": "hero.jpg",
"url": source_url,
},
operations=[
{
"type": "resize",
"width_in_px": width,
"height_in_px": round(width * 0.5625),
"fit": "cover",
},
{
"type": "convert",
"format": "webp",
"quality": 85,
},
],
)
variants.append({
"width_in_px": width,
"buffer": result["data"]["buffer"],
})package main
import il "github.com/iterationlayer/sdk-go"
client := il.NewClient("YOUR_API_KEY")
widths := []int{320, 640, 960, 1280, 1920}
for _, width := range widths {
height := int(float64(width) * 0.5625)
result, err := client.TransformImage(il.TransformImageRequest{
File: il.NewFileFromURL(
"hero.jpg",
"https://example.com/hero.jpg",
),
Operations: []il.TransformOperation{
il.NewResizeOperation(width, height, "cover"),
il.NewConvertOperation("webp"),
},
})
}
Five sizes at a 16:9 aspect ratio, all converted to WebP. Use these in a srcset attribute to let the browser pick the right size for each viewport:
<img
  srcset="/images/hero-320.webp 320w,
          /images/hero-640.webp 640w,
          /images/hero-960.webp 960w,
          /images/hero-1280.webp 1280w,
          /images/hero-1920.webp 1920w"
  sizes="100vw"
  src="/images/hero-960.webp"
  alt="Hero image"
>
The browser downloads only the variant that matches the device width, saving bandwidth on mobile and delivering sharp images on high-DPI screens.
Chaining Operations
Resize and crop are often just the start. The API lets you chain supported operations in a single request. Each operation’s output feeds into the next:
curl -X POST \
  https://api.iterationlayer.com/image-transformation/v1/transform \
  -H "Authorization: Bearer YOUR_API_KEY" \
  -H "Content-Type: application/json" \
  -d '{
    "file": {
      "type": "url",
      "name": "photo.jpg",
      "url": "https://example.com/photo.jpg"
    },
    "operations": [
      {
        "type": "resize",
        "width_in_px": 1200,
        "height_in_px": 900,
        "fit": "cover"
      },
      {
        "type": "sharpen",
        "sigma": 0.5
      },
      {
        "type": "convert",
        "format": "webp",
        "quality": 85
      }
    ]
  }'
const operations = [
{
type: "resize",
width_in_px: 1200,
height_in_px: 900,
fit: "cover",
},
{
type: "sharpen",
sigma: 0.5,
},
{
type: "convert",
format: "webp",
quality: 85,
},
];operations = [
{
"type": "resize",
"width_in_px": 1200,
"height_in_px": 900,
"fit": "cover",
},
{
"type": "sharpen",
"sigma": 0.5,
},
{
"type": "convert",
"format": "webp",
"quality": 85,
},
]operations := []il.TransformOperation{
il.NewResizeOperation(1200, 900, "cover"),
il.NewSharpenOperation(0.5),
il.NewConvertOperation("webp"),
}This resizes to 1200x900, sharpens slightly (common after downscaling), and converts to WebP at 85% quality. One API call, three operations, one result.
Practical Recipes
Thumbnail generation:
curl -X POST \
  https://api.iterationlayer.com/image-transformation/v1/transform \
  -H "Authorization: Bearer YOUR_API_KEY" \
  -H "Content-Type: application/json" \
  -d '{
    "file": {
      "type": "url",
      "name": "photo.jpg",
      "url": "https://example.com/photo.jpg"
    },
    "operations": [
      {
        "type": "resize",
        "width_in_px": 200,
        "height_in_px": 200,
        "fit": "cover"
      },
      {
        "type": "convert",
        "format": "webp",
        "quality": 80
      }
    ]
  }'
const operations = [
{
type: "resize",
width_in_px: 200,
height_in_px: 200,
fit: "cover",
},
{
type: "convert",
format: "webp",
quality: 80,
},
];operations = [
{
"type": "resize",
"width_in_px": 200,
"height_in_px": 200,
"fit": "cover",
},
{
"type": "convert",
"format": "webp",
"quality": 80,
},
]operations := []il.TransformOperation{
il.NewResizeOperation(200, 200, "cover"),
il.NewConvertOperation("webp"),
}Constrain to max dimensions (never upscale):
curl -X POST \
  https://api.iterationlayer.com/image-transformation/v1/transform \
  -H "Authorization: Bearer YOUR_API_KEY" \
  -H "Content-Type: application/json" \
  -d '{
    "file": {
      "type": "url",
      "name": "photo.jpg",
      "url": "https://example.com/photo.jpg"
    },
    "operations": [
      {
        "type": "resize",
        "width_in_px": 1920,
        "height_in_px": 1080,
        "fit": "inside"
      }
    ]
  }'
const operations = [
{
type: "resize",
width_in_px: 1920,
height_in_px: 1080,
fit: "inside",
},
];operations = [
{
"type": "resize",
"width_in_px": 1920,
"height_in_px": 1080,
"fit": "inside",
},
]operations := []il.TransformOperation{
il.NewResizeOperation(1920, 1080, "inside"),
}Smart crop for a social card:
curl -X POST \
  https://api.iterationlayer.com/image-transformation/v1/transform \
  -H "Authorization: Bearer YOUR_API_KEY" \
  -H "Content-Type: application/json" \
  -d '{
    "file": {
      "type": "url",
      "name": "photo.jpg",
      "url": "https://example.com/photo.jpg"
    },
    "operations": [
      {
        "type": "smart_crop",
        "width_in_px": 1200,
        "height_in_px": 630
      },
      {
        "type": "convert",
        "format": "jpeg",
        "quality": 90
      }
    ]
  }'
const operations = [
{
type: "smart_crop",
width_in_px: 1200,
height_in_px: 630,
},
{
type: "convert",
format: "jpeg",
quality: 90,
},
];operations = [
{
"type": "smart_crop",
"width_in_px": 1200,
"height_in_px": 630,
},
{
"type": "convert",
"format": "jpeg",
"quality": 90,
},
]operations := []il.TransformOperation{
il.NewSmartCropOperation(1200, 630),
il.NewConvertOperation("jpeg"),
}Center crop with padding:
curl -X POST \
  https://api.iterationlayer.com/image-transformation/v1/transform \
  -H "Authorization: Bearer YOUR_API_KEY" \
  -H "Content-Type: application/json" \
  -d '{
    "file": {
      "type": "url",
      "name": "photo.jpg",
      "url": "https://example.com/photo.jpg"
    },
    "operations": [
      {
        "type": "resize",
        "width_in_px": 800,
        "height_in_px": 600,
        "fit": "contain"
      },
      {
        "type": "extend",
        "top_in_px": 10,
        "bottom_in_px": 10,
        "left_in_px": 10,
        "right_in_px": 10,
        "hex_color": "#ffffff"
      }
    ]
  }'
const operations = [
{
type: "resize",
width_in_px: 800,
height_in_px: 600,
fit: "contain",
},
{
type: "extend",
top_in_px: 10,
bottom_in_px: 10,
left_in_px: 10,
right_in_px: 10,
hex_color: "#ffffff",
},
];operations = [
{
"type": "resize",
"width_in_px": 800,
"height_in_px": 600,
"fit": "contain",
},
{
"type": "extend",
"top_in_px": 10,
"bottom_in_px": 10,
"left_in_px": 10,
"right_in_px": 10,
"hex_color": "#ffffff",
},
]operations := []il.TransformOperation{
il.NewResizeOperation(800, 600, "contain"),
il.NewExtendOperation(10, 10, 10, 10, "#ffffff"),
}Product image with white background:
curl -X POST \
  https://api.iterationlayer.com/image-transformation/v1/transform \
  -H "Authorization: Bearer YOUR_API_KEY" \
  -H "Content-Type: application/json" \
  -d '{
    "file": {
      "type": "url",
      "name": "product.jpg",
      "url": "https://example.com/product.jpg"
    },
    "operations": [
      {
        "type": "resize",
        "width_in_px": 1000,
        "height_in_px": 1000,
        "fit": "contain"
      },
      {
        "type": "remove_transparency",
        "hex_color": "#ffffff"
      },
      {
        "type": "convert",
        "format": "jpeg",
        "quality": 90
      }
    ]
  }'
const operations = [
{
type: "resize",
width_in_px: 1000,
height_in_px: 1000,
fit: "contain",
},
{
type: "remove_transparency",
hex_color: "#ffffff",
},
{
type: "convert",
format: "jpeg",
quality: 90,
},
];operations = [
{
"type": "resize",
"width_in_px": 1000,
"height_in_px": 1000,
"fit": "contain",
},
{
"type": "remove_transparency",
"hex_color": "#ffffff",
},
{
"type": "convert",
"format": "jpeg",
"quality": 90,
},
]operations := []il.TransformOperation{
il.NewResizeOperation(1000, 1000, "contain"),
il.NewRemoveTransparencyOperation("#ffffff"),
il.NewConvertOperation("jpeg"),
}What’s Next
Chain with Image Generation to add watermarks or branded overlays to resized images — same auth, same credit pool.
Get Started
Check the docs for the full operation reference, including current operations and their parameters. The TypeScript and Python SDKs handle file upload and response parsing.
Start the 7-day trial. Send an image, try the different fit strategies, and see the results.